Z/Yen Group 2009 E‑calendar
You can download our 2009 e-Calendar by clicking here and following the instructions.
Installing The e-Calendar
Depending on which browser you have, you will be asked whether you want to run or save the install file. If you can, choose run as this is slightly quicker, but it doesn't really matter. If you choose to save the file, go to your downloaded files folder (this may well be your desktop) and double click on install.exe, which will launch the setup program.
You can safely accept all the default settings and create a desktop icon and/or Quick Launch icon if you like.
Using The e-Calendar
Every operation is carried out with JUST ONE CLICK on the left or right buttons of your mouse.
To enter your daily notes in the data entry box below the calendar month, type them in and click on the picture, the calendar month or any one of the navigation buttons (or the space between them) to save your data. The text will change from grey to black to let you know it has been saved.
If you want to delete an entry for a given day, highlight the text, hit the delete button on your keyboard and click once (as above) to permanently delete your daily notes.
You can also use the right click button to cut, copy, paste or delete text as in any Windows® application. Remember to confirm by clicking 'outside the box' as above.
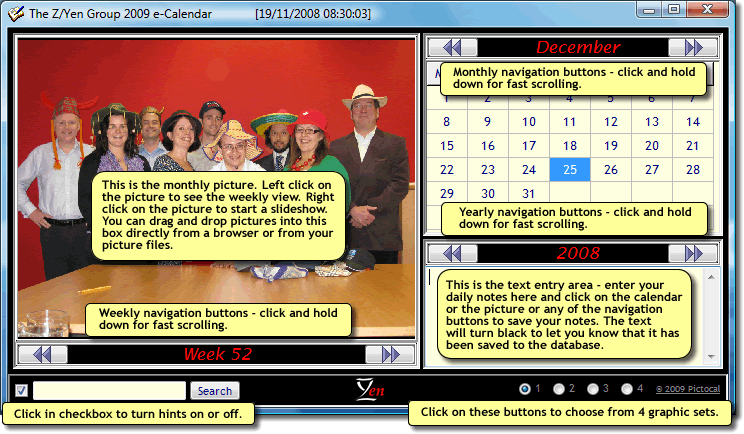
To insert a new picture into the e-calendar, drag and drop a picture file icon from your own computer or local network or a picture from your browser. You can save changes made to the 3 personal picture sets as many times as you like, but not to the default picture set 1 (which can be changed for the duration of a diary session, but these changes will not be kept after the program is closed).
To toggle between weekly view and picture view, click on the picture to see the week and vice-versa. To get a fully configurable screen slide show, right click on the picture and right click again if you want to change the slide show settings.
At the bottom left hand side of the e-calendar, there is a check box for displaying or removing hints. Once you get used to using the e-calendar, you can turn the hints off by unchecking this box.
In weekly view, if you want to select and activate the data entry box for a particular date, click on the date. Note that the weekly view is read-only and all edits must be made in the data entry box at the bottom right.
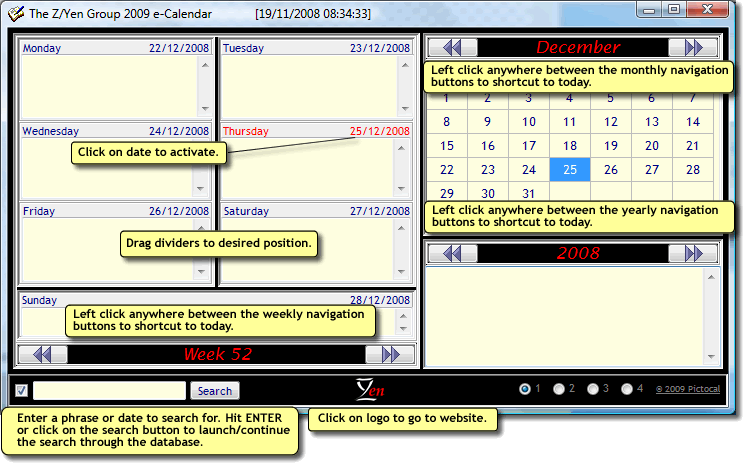
Use the search box at the bottom left to locate a particular diary date or any text you may have entered in the diary. The calendar contains all dates for just shy of the TEN THOUSAND years between the 4th January AD 100 and 26th December AD 9999!!!
You can maximise, minimise or resize the calendar and drag the separator bars around to get just the view that suits you. Your settings will automatically be remembered the next time you use the calendar.
No matter where you are in the diary, you can immediately shortcut back to TODAY by left-clicking on the space between the week buttons, year buttons or month buttons.
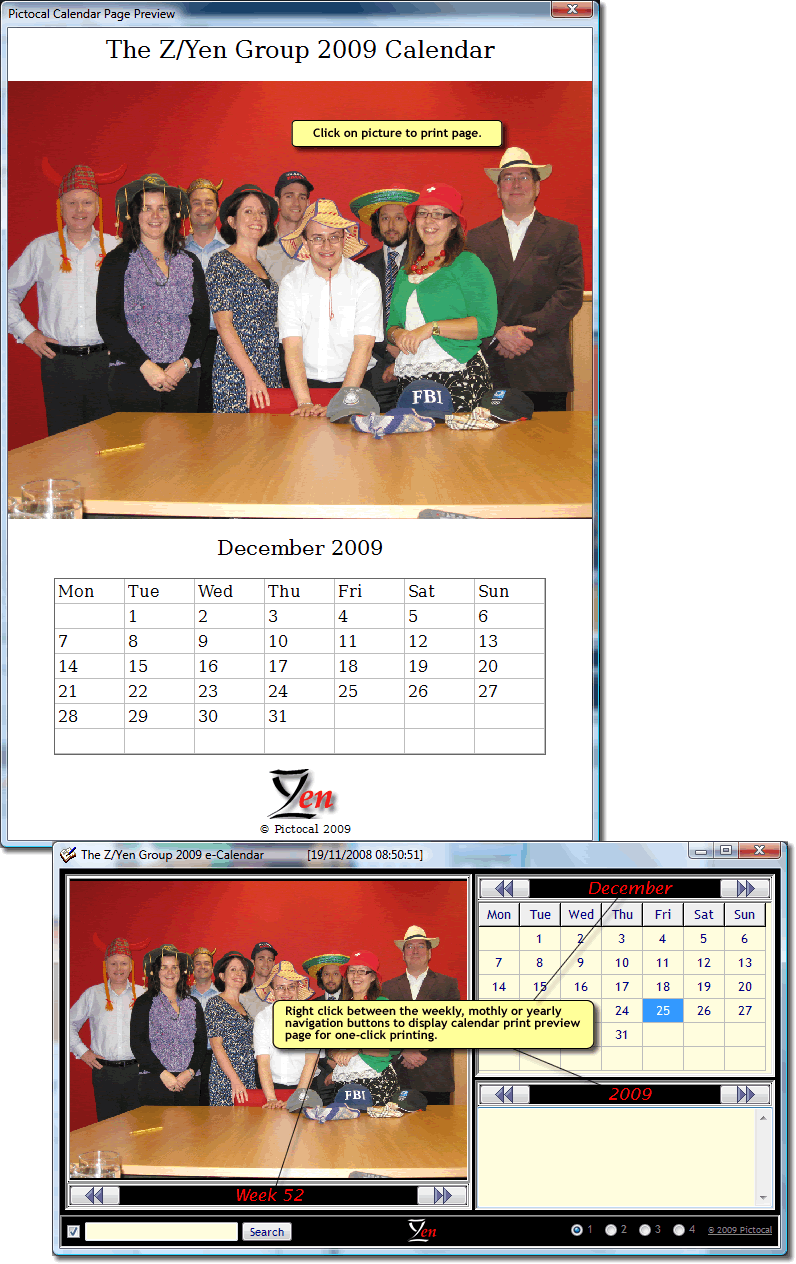
If you right-click in these spaces, you will get a printable calendar page for the active month. If you click on the picture on this preview page, you will be taken to a printer dialog box where you can choose your printer and print off the page.
If you have any problems, you can e-mail for support at info@pictocal.com.